
|
Hood Lock (on a 65 Chevelle)
Authored by Wes Vann, modified April 29, 2000
In almost all of the postings that have anything to do with security, I end up saying how you have to keep the hood locked. Although I don't really like the idea of giving away any of my secrets, here is what I did for a solid hood lock. It really covers two different methods that I worked up. The second is the most straight forward and positive.
Both methods require that you have some fabrication skills!
This page is rather intensive with photos. (some are "clickable" to a larger version) There really isn't any other way to show what I've done. I'm sorry if it takes a long time to load.
What ever type of "alarm" you have, you have to know that the hood is locked down solid!
General comments and notes; (things to be said up front)
The first method that I was going to do, required a cable lock assembly that is currently available through JC Whitney for around $29.99 (info thanks to Christopher Turner). I used this type assembly in an earlier car that I had and it always worked well. What is scary is if the cable breaks or gets gummed up. It is possible to hook up a "kill switch" or relay off the unit, but that means that you are working it a lot more, and risk it breaking.
The bracket that I made that mounts on the hood, was used for both methods. I had to drill an extra hole for the second method.
In both methods, I was after a method that could be removed at a latter date so that the car could be returned to "stock". The second method works best for this.
The first method;
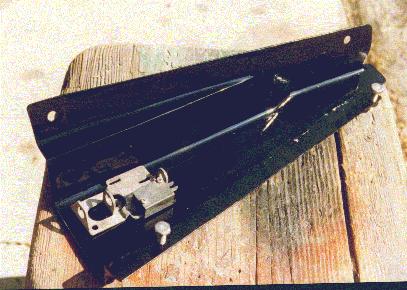
In this method, I was going to use a hood lock cable (currently available through JC Whitney). On one end, there is a housing that has a circular lock type key and also an indicator led. The led could be wired as an indicator light for the alarm. On the other end (to be mounted at the leading edge of the hood) is a plunger that catches on a bracket with a hole in it. There is also a switch that can be wired to the indicator led or kill switch.
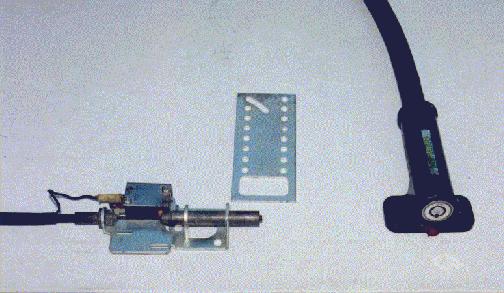
To do a good job with this assembly, you have to make a mounting bracket for the end of the unit, and also a solid bracket that forms the hole that the plunger goes into. (the photo above shows the simple bracket that comes with the kit)
The mounting bracket that I made went between the radiator core support and the front of the grill. It took quite some time to make up the shape that was required!! It's all sheet steel, cut and welded into shape.
Here is a photo of the bracket after painting and the cable-end bracket in place.
What can't be seen in the photo above is that nuts were welded on the underside for both the "cable-end" bracket and the two bolts that are shown. The nuts have to be welded in due to the fact that once the bracket is installed, you can't get to the back side.
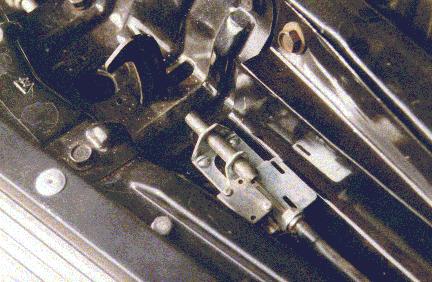
In this photo, you can see how the cable runs off on the lower right of the photo. It runs behind the headlight assembly, between the inner and outer fender panels, through the firewall, and then the other end is mounted at the lower edge of the dash. (I never really ran it through the firewall, I ended up doing the other method)
You can see the bolt (there are two) that goes through the radiator core support. It's the rusty bolt head.
You can also see the bolt that goes through the leading edge of the grill cross member. (it's the bolt head that is below and to the left of the cable bracket.
The really big thing to note is that nothing can be reached or removed, even if they kick in the grill!
Next is the bracket that is mounted on the leading edge of the hood. As I said in the beginning, I was after something that was "removable".
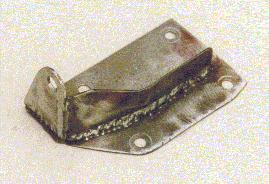
The bracket was fabricated out of flat sheet steel and is bolted between the hood and the stock hood latch bracket. The big hassle (that only applies to the first method) is that the flange with the hole has to be exactly in the correct position for the lock plunger. To make this, I ended up having to mount it and repeatedly open and close the hood. The location of the hole is established by putting a small amount of grease on the plunger, and then extending it until it touches the flange.
Another thing about that bracket, you have to make sure that it doesn't stop the stock hood latch from working!! The photo above shows the final position of the bracket. Note that it's removable and that all four hood latch bolts hold it in place.
At this point, the first method was "workable". Except for running the cable through the firewall and mounting the "key" end.
I spent a lot of time trying to think of a good place to mount the "key" end of the cable. The problem was that there was already a ton of other stuff mounted in that location.
I also wanted something that was real straight forward and simple. As a result, I went to the second method.
The second method;
I've spent a fair amount of time telling people that even if they have to use a chain and lock, just keep the hood locked. This method is dang close to being that simple.
What I needed was a steel strap that would "hook" on the hood bracket, slide between the radiator and grill, and then be locked to something behind the bumper.
By there being a "hook" at the top of the strap, the only way that the strap can be removed from the hood bracket is by rotating it horizontal! (the hood has to be wide open!!)
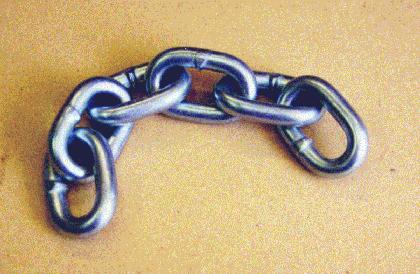
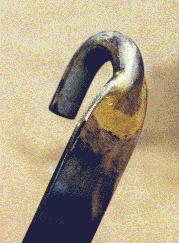
The strap bracket should have a hook on it made out of hardened steel as this would be the weak part of the strap. The hook is just a section of a chain link! (that is why there is a photo of a chain at the top of this page)
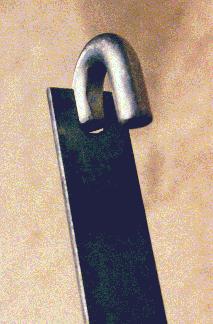
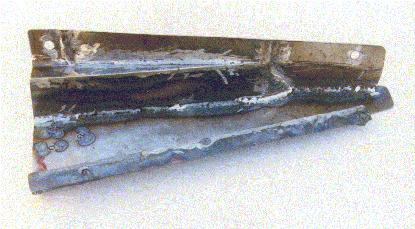
The strap is nothing more that some one inch wide steel. I notched it as shown and then brazed it together.
Then I shaped the end of the strap so that it looked clean.
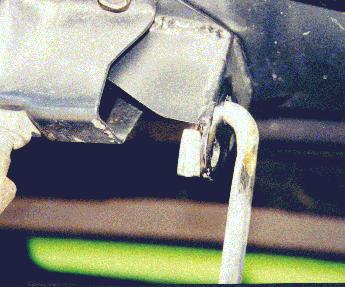
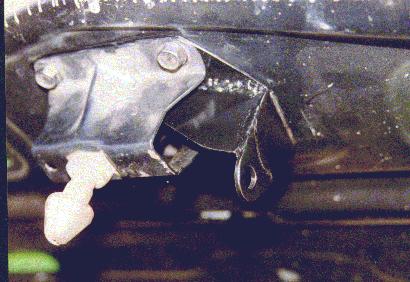
Here is a photo of the strap hanging from the hood bracket. Notice that I ended up drilling a new hole in the hood bracket. This was required so that the bottom edge of the hook wouldn't hit the hood latch bracket at the grill. I'm going to have to grind off the lower section just to make it cleaner.
Here is the strap hanging in position. As I said before, in order to remove the strap, it has to be rotated horizontal. Once removed, there is nothing hanging down lower that the stock hood latch pin (that always manages to find my bald head).
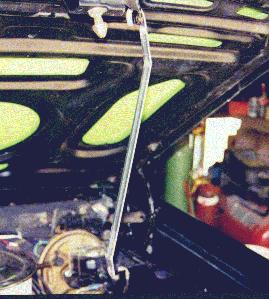
The reason for the bends in the strap is that it has to clear the stock latch mechanism. The strap slides down between the radiator and the grill, while you close the hood.
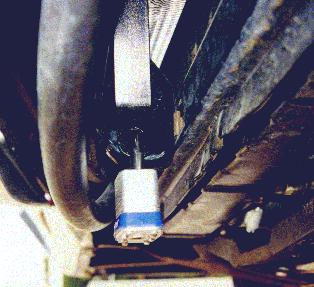
This photo shows the end of the strap when the hood is closed. I drilled a hole through the existing grill bracket and that's what the strap is locked to.
The lock sits behind the bumper (behind the license plate). It can only be seen if you look real hard!
One of the things that surprised me is that it doesn't rattle, which I thought would be a problem!
The strap is painted black and isn't noticeable through the grill. The strap doesn't restrict any air flow.
tecref25.html