

|
Technical Reference #6
Floor Pan replacement
Authored by Wes Vann, updated on March 22, 1997
PLEASE NOTE; It's recommended that you use heavy gloves any time working with cut metal. It's a requirement that you use eye protection any time using power grinders. It's also a requirement that the correct welding goggles be used. Any time that welding is being done, a fire extinguisher should be readily at hand.
I first have to state that I am not a professional body man. I have however, ended up doing almost all of the work on the cars that I own. Replacing floor pans isn't that hard, but it does require the purchase of a quality welder and your knowledge of being able to use it safely.
When arc welding, it's ABSOLUTELY imperative that you use all of the safety equipment that is standard. If you watch the arc, you WILL permanently damage your eyes. It's even possible to get a sun burn on your skin from the light emitted by the arc.
When I purchased my wagon, the floor pan on the drivers side front had already had some flat steel plate welded in. If you sat in the rear seat and removed the plywood on the floor, you could watch the road go by (you have to think of the Flintstones).
I went by one of the reproduction part suppliers (insert Original Parts Group or Year One here) and looked at the pans that are available. There is a long one piece pan and also a set of smaller pans. The accuracy of the stamping in the long pan didn't seem to be of the quality of the smaller pans.
In order to use the small pans, my car required three pans per side to repair my car. This would run from partially up the firewall, all the way to the rear seat. It doesn't include the tunnel. As far as I know, nobody manufactures the tunnel steel. Due to the fact that water doesn't collect on the tunnel, it doesn't rust (much).
The added bonus of using the smaller pans is that it requires that you only work a small area at a time making it easier to fit.
I inquired at several body shops as to the cost of welding in the pans and it soon became evident that I could justify buying that MIG welder that I wanted.
You will have to remove all of the floor jutting (along with seats, carpet, etc. Duh).
You will also have to be sure that anything of value is covered during grinding or welding. The sparks generated during welding can permanently pit the glass.
I started with the firewall section. Lay the replacement panel on the existing floor and outline it with a "sharpie" felt marker. If possible, replace the minimum height up the firewall. This area is difficult to get into and weld. Cut the new panel at the required firewall height and draw a new tracing line.
Measure in 1/2" from the tracing lines and draw the cut lines.
There are several ways that you can cut the original or new pans. I tend to use a Makita 4" grinder with cut-off wheels. (I went through tons of them, but it was well worth it) It's also possible to do a certain amount of the cutting with tin snips. There are different types of snips, depending on what you are doing and the direction of the cut (clockwise or counter-clockwise). I recommend that you wear gloves to prevent cutting your hands on the sharp edges.
Before you do ANY cutting of the existing floor, you have to look under the car and make sure of what you are cutting. The object is to only cut the floor pan. Verify that all of the electrical and fluid lines are out of the way. There are various stiffeners and support members that shouldn't be cut. The existing floor pan is spot welded to these members.
When removing the firewall section, there is a support bracket that forms one of the body mount points. There are also cross supports for the seat mounting when you are doing the rearward pans. DON'T cut any of the support members!
In order to get the pan free from the spot welds, I grind on the surface of the pan in the area where I suspect a weld. You can locate most of the welds by looking for a round low spot (about 3/8" in diameter). When the pan material is getting thin in the location of the weld, the thin metal will tend to discolor in relation to the thicker metal. At that point, you should be able to pry the pan loose at that location, and then go to the next weld. After the original pan is removed, grind the remaining material at the spot welds flush.
In the location of the (prior) existing spot welds, I punched 1/2" holes in the new pans in order to weld them on. The reason that I "punched" them and didn't just drill the hole was that I didn't want to distort the pan. (there is a simple tool that can be purchased for punching, once a small hole is drilled)
Prior to welding in the new pan, you have to grind the surface on the remaining pan where it is to be welded. You also have to grind clean where the replacement welds for the spot welds. You should also paint the new pan with a sealing primer (such as PPG DP90).
Place the new pan in position and weld in. Do the welding in sections in order to keep the heat down. Fill the "punched" holes with weld.

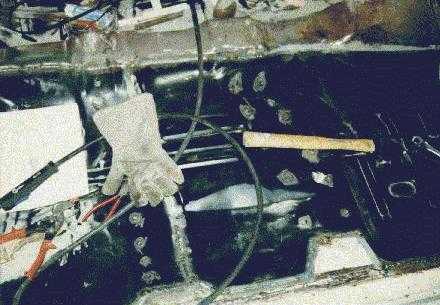
The burn marks in the middle of the panel are where I welded in the punched holes to the support bracket on the other side. (at the time that the photo was shot, I had already placed the other panels)
As an added note, I have converted the car to a TH350 and had to hammer a small bump in the floor pan right where this panel and the tunnel are welded together. This could have been done at a latter date had the trans not been in position at the time of doing the panel.
The next panel continues from the firewall panel to the rear seat support for the front seat. It overlaps the firewall panel.
Once again, you have to be careful that you don't cut into the supporting brackets.
The method of grinding down the existing spot welds is the same as was used for the firewall panel.
This photo shows where I welded the center panel to the front seat support. What it doesn't show is that the center panel is welded to the rear support bracket prior to placement of the rear panel.
I used a wire brush to remove any surface rust on the cross support brackets and treated them with "Marhide" rust converter (similar to POR15). The areas where the weld would replace the spot welds was ground down to clean metal.
Prior to placing the panel, you have to punch the holes for the seat attachment bolts. The nut plates are in the support bracket. I'd recommend that you put in the seat attachment bolts to hold the panel in place during welding.
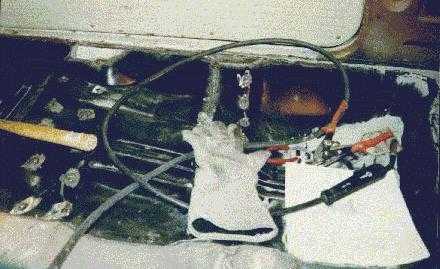
In this photo, you can see the rear panel and how it curves up to the area under the rear seat. (the front of the car is to the left)
After the center panel is done, move on to the rear panel. This panel will over-lay the center panel and will also require punched holes where the original spot welds were.
When done, I ground the welds down to a reasonable height and rewelded as required. I didn't grind the welds down flush due to my welding not being the best in the world and the fact that the carpet and padding would hide them.
I used a 3M seam sealer on all of the seams in order to make sure that they were waterproof and then repainted the surface. I drilled several small water drain holes where the water would tend to collect. (keep in mind that I live in California and don't drive through deep puddles of water)
On the underside, I purchased several spray cans of undercoating and sprayed everything. This is a messy job due to having to have the car on jack stands at the time, and spraying upward.
Good luck and be careful not to burn down the garage.