

|
Tools #2
Volt/Ohm meters
Authored by Wes Vann, last revised on April 13, 1997
This page is intended to be basic in nature! It's almost a standard to use water in explaining how electricity works, and that's what I'll be doing. The place where the water comparison falls apart is that your garden hose doesn't need a complete circuit to have the water flow.
PLEASE NOTE; Although most of the voltage found in a car can't cause physical harm, it is possible to burn up the wiring or even start a fire with a careless spark!
GENERAL TERMS AND THEORY
In order for electricity to work, it needs a complete circuit. It has to be able to not only leave the battery, it has to have a path back to it! Normally, the last part of that path is through the metal of the body and this is called "ground". All references to a voltage are in relationship to this ground.
Volts; This is the force behind the electricity. Or the "pressure" at the faucet.
Amps; This is how much electricity flows. Or gallons per minute of water through the hose.
Ohms; This is the resistance of the wire to flow of electricity. Or thinking of the difference between a small diameter hose and a large diameter hose. The range of ohms goes from zero to infinity. Zero ohms is when it's real easy for the electricity to flow. A reading of infinity is when there is no path for the electricity to go through (a closed valve).
Watts; This is power and is a function of amps and volts.
DC; Direct current. Other than within the alternator, all of the voltages in your car is "direct" current.
AC; Alternating current. This is what you would see in the wiring in your house. 110 volts is in reality a wave that goes from a positive value to a negative value. Don't play with the house wiring!!
Primary voltage; This is the input voltage to the coil and is around 12 volts (I'm trying to keep it simple!).
Secondary voltage; This is the output from the coil and is MAJOR voltage. This is what ends up going to the spark plugs and will cause personal damage if you grab it!
Leads; These are the wires that are hooked up to the meter (I'm not trying to be a smart ass, honest). Normally the leads are black and red.
Alligator Clips; These are the clips that enable you to attach the lead to something.
Normally when you buy one of these meters they have both functions of reading volts and also ohms. The explanation of what they do has to be written separately for clarity.
It's possible to get an analog meter or a digital meter. The digital meters are more costly and really aren't required for checking out most automotive problems.
VOLTMETER;
In order to read "volts", it has to be in a reference to another point. Normally this reference point is ground. As an example, if you want to read the voltage of the car's battery, the negative wire from the gauge has to be to the negative terminal on the battery, while the positive wire is touching the positive terminal on the battery. If the negative wire is removed, you lose the "reference" and there is no voltage reading.
You have to make sure that the setting on the meter is at "DC" and that the "range" is larger than the voltage that you expect to read.
OHM METER;
Ohms are the amount of resistance in an object to let electricity flow through it. With a good meter, it's possible to read the resistance from your left hand, through your body, to your right hand.
How, Why, Examples, and Tips;
Tip #1; Totally questionable wiring in car.
When I purchased my car (64 2dr wagon), nothing worked and I had to have the car towed home. In the process of rebuilding and modifying it, a lot of the already questionable wiring was changed.
I didn't want to just hook up the battery and have the car go up in smoke.
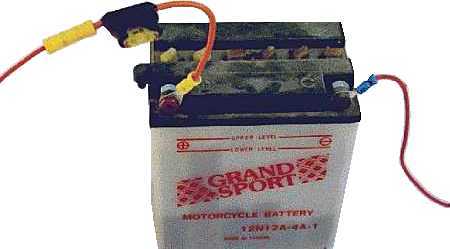
What I did was, remove all of the fuses and get a motorcycle battery with which I could feed in electricity to the circuits that I wanted to check. (yes, I know the water level is low)
I wired up a in-line fuse connector and installed a 20 amp fuse. This way, if there was any problem, the fuse would blow.
I could then safely check each circuit and not fear damaging anything. It took quite some time, however there are no burnt wires to show for it!
Example #1; Tail lights don't work.
To check out the situation at the bulb, you have to first remove the bulb.
1. Hook up the black lead on the meter to any metal on the body using the alligator clip (a screw head works great). Set the meter to ohms and then touch the red lead to some other metal point on the body. The meter should now read zero ohms. This confirms that the ground connection is good.
2. Take the red lead and touch the bulb housing. The meter should read zero ohms if the housing is grounded correctly.
3. Now set the meter to volts. As stated before, if there are several setting for volt range, you have to set the meter to a range that is larger than what you expect to read (12 volts).
4. With the light switch turned on, take the red lead and touch the contact inside the socket. The meter should read 12 volts.
If you don't have 12 volts, you will have to trace the wire back and find out where it isn't hooked up.
If you do have 12 volts and the housing is grounded, then the connection to the bulb has to be bad (or the bulb is bad).
You can check the bulb by setting the meter to ohms, holding the black lead on the bulb housing, and touching the contact. You should be able to read the resistance of the wire in the bulb. Be carefull that you are not reading through yourself as you hold the leads.
Example #2; Your fuel gauge doesn't work.
In order for a gauge to work, it needs three things. There has to be a ground reference, a solid 12 volts, and there has to the amount of resistance sent from the sending unit.
1. Hook up the black lead to ground and verify the connection as above.
2. Set the meter to volts and check if there is 12 volts to the gauge.
3. Set the meter to ohms and check if the gauge has a solid ground. (One of the things that you have to be careful of when reading ohms is that you are not reading through something. It's possible to read through a bulb, and think that you are reading ground. When in doubt, remove any objects that you may read through and get misleading results.)
4. With the meter still on ohms, remove the wire from the sending unit and read the resistance (ohms). On GM sending units, an empty tank should read as zero ohms, a full tank should read as 90 ohms (half a tank is 45 ohms).
If you have all of above, I'd guess the gauge is bad.
Example #3; I'm open for suggestions.